DIY Wine Bottle Chicken Grit + Calcium Dispenser

Even backyard chickens on a diet of good-quality layer feed need two very necessary supplements: grit and a calcium supplement. Both perform very different functions in a chicken's diet.
Both grit and the calcium supplement should be fed free-choice (meaning in a separate container, not mixed into the feed) so your chickens can each eat as much or as little as they need.
Both supplements can be purchased commercially, but also can be procured for free, without spending a dime.
Chicken Grit
Grit is basically coarse dirt, small stones or pebbles, which is stored in the chicken's crop and helps them grind and digest anything they eat other than commercial feed. Since chickens don't have teeth, they need something to help grind up their food.
Chicken flocks that are allowed some free range time on a regular basis generally don't need to be provided commercial grit, they will find enough small stones and pebbles on their own while they roam.
Chicken Calcium Supplement
Chickens also need some sort of calcium supplement. They need calcium not only to make strong shells on the eggs they lay, but also to make the contractions that helps them to lay their eggs.
Crushed oyster shell is the predominant commercial calcium supplement on the market, but crushed eggshells can be provided more economically from home by saving and crushing your hens' shells to feed back to them.
Regardless of whether you buy grit and calcium supplements for your chickens, you'll need a dispenser for them since both should always be offered free-choice as I mentioned earlier.
And note: if you live in a cold climate, you might want to collect some dirt in buckets to give to your chickens through the winter when the ground is frozen. If you have a dust bath for your chickens in a protected area, they'll pick stones out of that in the winter as well.

I'm sure you've all seen the DIY tutorials for the PVC pipe grit and oyster shell dispensers, but I made something that I think is a bit more quaint and rustic AND easier and less expensive to make.
By simply repurposing some materials you probably have lying around the house or garage, you can easily make these wine bottle dispensers.

DIY Wine Bottle Chicken Grit + Calcium Dispenser
- An empty wine bottle, or other glass bottle
- A shallow metal can, such as a tuna fish can
- A board approximately the same height as the wine bottle
- A length of twine (I used baling twine from a bale of straw)
- One or two small screws
- Drill with drill bit
What you Do | Position the wine bottle centered upside down on your board and with a pencil mark one either side of the bottle a few inches down from the top (base) of the bottle and again just where the neck begins to narrow.
You will want to position your bottle so there's about a half inch of board below the narrow mouth of the bottle.
With a good-sized drill bit, drill your holes where you marked and also drill an additional hole centered at the top to hang your dispenser when it's done.
Position your wine bottle and then thread a length of twine through the two upper and two lower holes to hold the bottle in place snugly, knotting the twine on the backside.
Position your tuna can under the mouth of the bottle, flush with the bottom of the board.
This should leave about 1/2" of headroom between the bottom of the can and the bottle. Mark where the can should go with your pencil.
Pre-drill a hole or two in the side of the can and then remove the bottle so you can screw the can in place onto the board, lining it up with the pencil mark you drew.
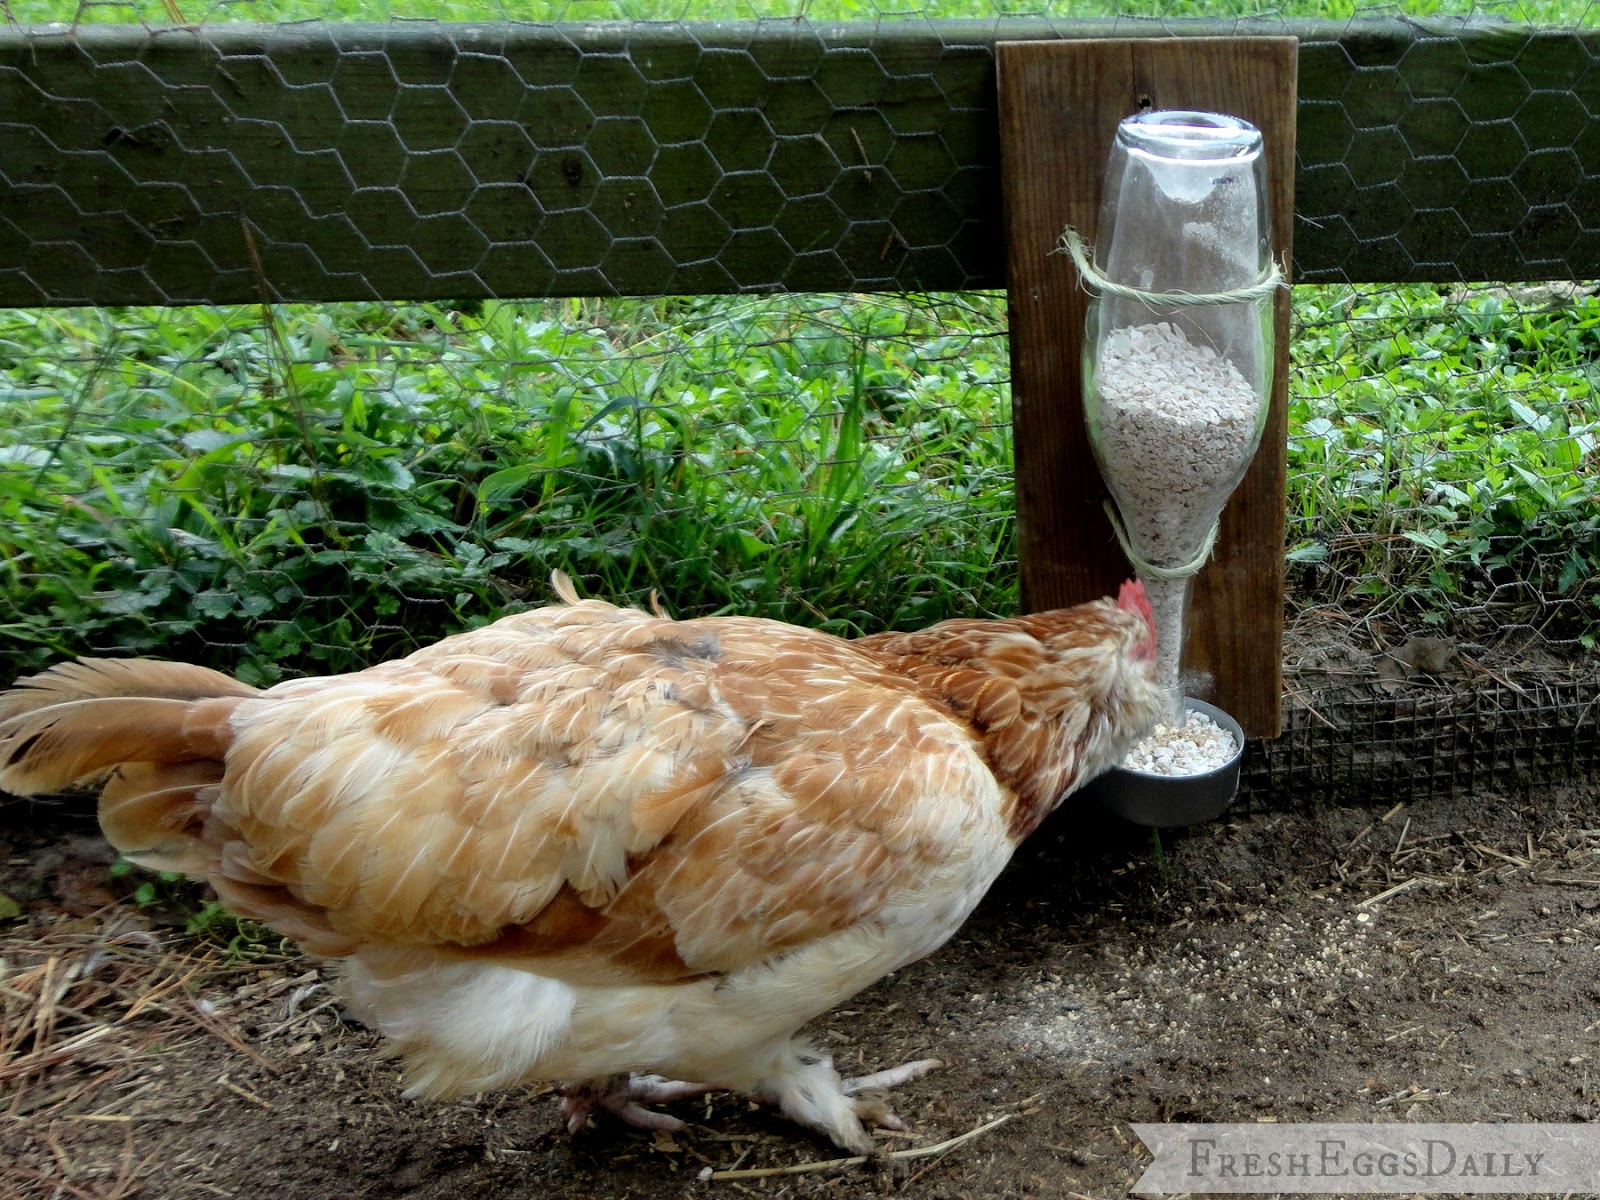
Using a funnel, fill your bottle with crushed oyster shell or eggshell (or a mixture of both as I did here) for your calcium dispenser, or grit/coarse dirt for your grit dispenser, and slide the bottle back down into place with the twine holding it.
The can will auto-fill as it is emptied.
Hang your dispenser on the side of your coop wall or run fence post using a nail and the hole you drilled at the top of your board. Be sure it's protected from the weather so rain doesn't fill your tun can.
You can easily see when it's time to refill the bottle. Just slide the bottle up and out, flip right side up, and refill using your funnel.
If you kept the cork, you can re-cork the bottle so the contents stay put while you invert the bottle and get it repositioned.
It won't take long until someone strolls by to have a look-see.


 |
Here's another, fancier dispenser I made them since the first one was such a big hit!