The 21-Day Guide to Hatching Chicken Eggs
Ever since starting to raise chickens, I had in the back of my head to try hatching eggs one day. I have had a few broody hens each spring and figured that was the way I would go.
But then Brinsea agreed to donate a Mini Advance incubator to me and in return I agreed to chronicle the hatch via Facebook and here on the blog.
The 21-Day Guide to Hatching Chicken Eggs
Preparing to Hatch Eggs
I placed my order online for fertile hatching eggs and so the great Egg Hatching Tutorial was conceived. I hope you will follow along and share in this exciting journey.
Before I started, I read the manual that came with my incubator, read all the information I could find on the Brinsea website including the Incubation Handbook and also consulted with Brinsea via phone, learning the finer points of hatching eggs.
Hooray!!! The eggs have arrived !!!
The first thing I need to do is open the box, then wash my hands and unpack them. If any of the eggs are soiled, I would want to remove as much of the dirt as possible carefully with a fingernail or rough cloth.
You don't want to wash hatching eggs with water. The will remove the bloom which regulates the inflow and outflow of air through the pores in the shell and also protects the embryo from bacteria on the shell.
Candling Hatching Eggs
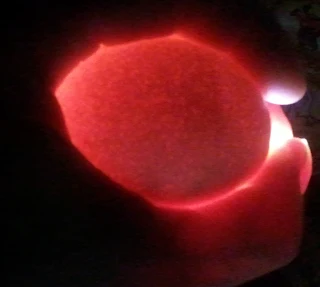
Next I need to candle each egg to be sure there aren't any hairline cracks. I am using a Mag-Lite flashlight and just cup my hand around the beam in a dark room and inspect the egg, looking for cracks. The eggs all look perfect.
Had I seen any cracks, I have a stick of beeswax that I can use to 'seal' small cracks to keep bacteria and excess air out of the egg.
If you plan on hatching on a regular basis, investing in a Brinsea Egg Candler will make the job easier. It has a sturdy base that you set the egg on, so there's less chance of dropping it.
Numbering or Marking the Hatching Eggs
Then I number each egg with a pencil and put them pointy end down into a clean egg carton at a 45% angle to let them come up to room temperature.
By marking one side of each egg, I'll be able to keep track of the turning of the eggs, which is a very critical step in hatching.
Setting up the Incubator
My Brinsea Mini Advance incubator is plugged in and heating up to 99.5 degrees. There are a few types of incubators, so be sure to read the instruction manual for your particular type.
The Mini Advance tracks the day of incubation, heat and humidity.
When the eggs are first added to the incubator, the temperature will go down, but within a short time should rise back to 99.5, if that temperature had been maintained for several hours prior to putting the eggs in.
Only small increases should be made manually if necessary, waiting several hours in between.
The Brinsea Mini Advance Incubator
The Mini Advance is completely automated and really easy to program. It has default setting that you can choose to override if you wish for the temp, Fahrenheit or Celsius, # of days, etc.
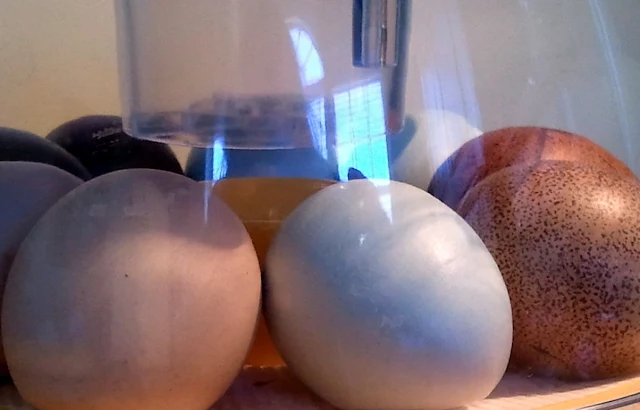
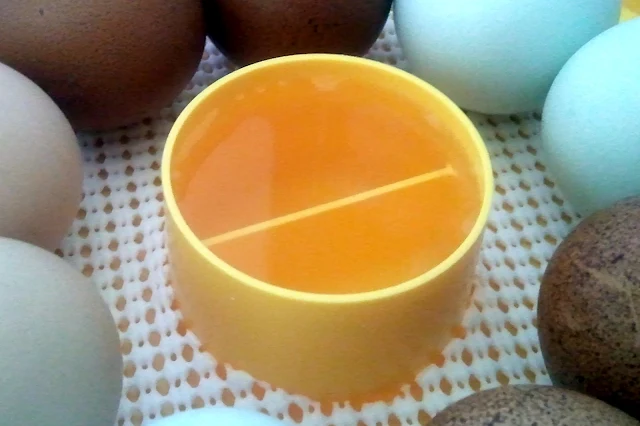
Here is the 'nursery' waiting for the eggs to be put in the incubator so the embryo development can start.
In addition to the incubator, I have my Mag-Lite nearby so I can continue to candle the eggs throughout the hatch, also a list of 'reminders' and a calendar with the 21 days of incubation marked.
Monitoring Humidity in the Incubator
I also have a pitcher of water to add to the reservoir to help maintain the proper humidity levels.
You want the humidity level to stay between 40-50% for the first 18 days, and then increase it to 65% during "lockdown" which is the last three days of the incubation period, so the membranes don't try out and "shrink wrap" the hatching chicks.
Let's Hatch Chicks!
Until the eggs are warmed, they won't start developing. It is recommended to let the eggs sit out for a few hours (up to 24 hours) to allow them to come to room temperature before putting them in the incubator.
On the very first day of incubation, a line called the primitive streak appears. From these cells, the organs of the chick's body will begin to form. By the end of the first day, the head, eyes and nervous system have already started to form, as has the vertebral column.
The 21-Day Guide to Hatching Chicken Eggs
Okay, the eggs are in the incubator! The temperature dropped a bit right after I put them in, but gradually climbed back to 99.5. Perfect.
The temperate in the incubator should stay between 99.3 - 99.6° for an optimal hatch. The acceptable range is 97° to 102°F. Below 96° or above 103°F and the embryos can die. However, overheating is far worse than under-heating.
A temperature in the incubator over 103°F for just 15 minutes will seriously impact the embryos and most likely will kill them, while the temperature dropping down to 95°F for 3-4 hours will merely slow down the chicks' growth rate.
Turning The Hatching Eggs
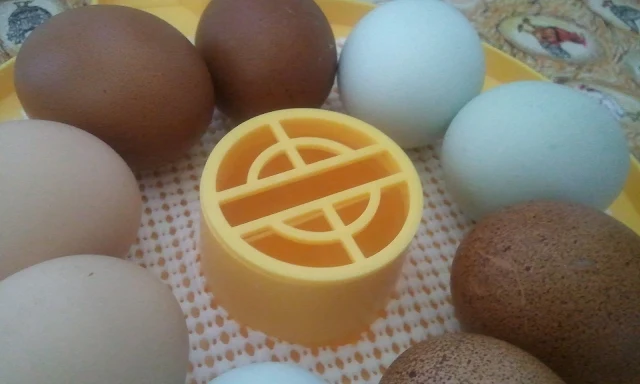
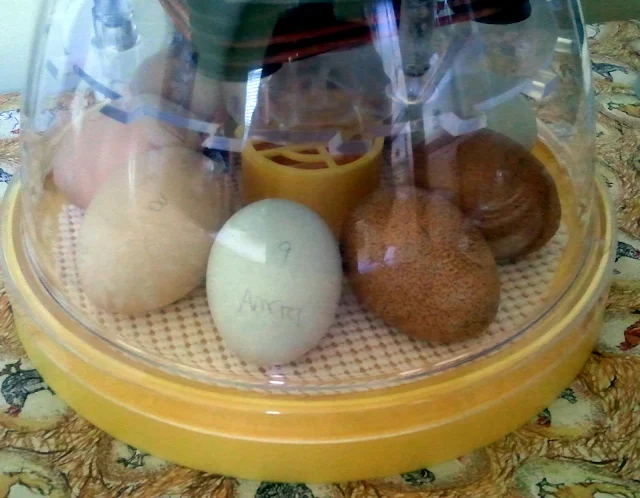
Since the Mini Advance only holds seven eggs but I had more than that, I took out the auto turner and put in a sheet of paper towel and fit in nine eggs (a piece of rubber shelf liner works well too to keep the eggs from sliding around when you turn them).
I will manually turn the eggs for the first few days and then candle them to pick out the seven that appear most viable. The other seven eggs I gave to a nearby friend who also raises chickens. She has made a homemade incubator and will keep us posted on how her hatch experience goes.
The eggs made it through their first night just fine. Today the heart is being formed and will be beating after the eggs have been in the incubator for approximately 42-44 hours.
I turned the eggs at 6am this morning. The turning is important throughout the hatch because the yolk tends to float upwards to rest at the top.
The embryo, which rests on top of the yolk, possibly because nature has made it so the embryo is in the best position to receive body heat from the mother hen, is therefore squeezed between the yolk and the shell where it can be damaged, or even killed, and also can stick to the shell membrane.
By turning the egg, the embryo is swept back into the white, where there are fresh nutrients that help the chick develop. The turning is most important during the first week before the chicks' circulation system is developed, but must be continued for the first 18 days of incubation.
I also checked the water reservoir. The water is important because eggshells are so porous and low humidity levels in the incubator can lead to dry membranes/shells that trap chicks inside, as well as smaller birth rates.
As I mentioned before, but it bears mentioning again, the humidity level for chicken eggs should stay between 40-50%, and then increase to 65% or more during the actual hatch. (using the Brinsea incubators, one reservoir gets filled for the first 18 days and then the second is filled on day 18 just before lockdown)
Day 3The eggs are still percolating along at a constant 99.5 degrees. The heart in each viable egg is functioning by now, but not fully formed yet, and is actually outside the body. More blood vessels are being formed and should be visible when I candle the eggs tomorrow. The legs and wings begin to form.
I am turning the eggs religiously. They need to be turned at least three times a day, roughly 6am, 2pm and 10pm, but more frequent turning more closely mimics the actions of a broody hen. A hen sitting on eggs will slightly shift her weight about every half hour, causing the eggs to shift.
Throughout the day, she will turn the eggs with her beak and also rotate the outside eggs to the center periodically.
You can mark an X on one side and an 0 on the other of each egg to be sure you turn them all 180 degrees, but I have mine numbered instead, so I'm using that as my marker for turning to be sure each egg gets turned the correct number of times each day.
Regardless of the number of times during the day you turn the eggs, it should always be an odd number so the embryo alternates which side of the egg it spends the night on.
Today the amniotic sac has formed and the embryo is now floating in the amniotic fluid. The tongue is beginning to form.
Here are the six different breeds we are hatching:
Welsummer - a Welsummer chicken is the rooster that is on the Kellogg's Corn Flakes box, but we're hoping for hens that lay brown speckled eggs
Olive Egger - the olive-colored egg laying chicken results from a Marans rooster and an Ameraucana hen mating and therefore hatches from a blue egg but lays olive green eggs
Black Copper Marans - these gorgeous black hens with copper accents lay the darkest eggs of all the Marans breeds
Blue Copper Marans - pretty blue gray hens lay dark brown eggs
Day 4 is a little early to candle the eggs but it's so hard to be patient ! In this Olive Egger (#3) you can already see some spider veining and the beginning of the eye.
It is important to candle the eggs - generally Day 7, Day 14 and Day 18 just before the 'lockdown' and discard any that aren't developing because a 'bad' egg can explode and contaminate the other eggs with bacteria.
A sitting hen instinctively knows which eggs are not going to hatch and will literally toss them out of the nest, so no candling is necessary when your are hatching your eggs 'au naturale'.
Egg Hatching Biosecurity
It is very important to wash your hands well before handing the eggs, especially if you are coming straight from interacting with the rest of your flock.
Disease and bacteria can easily be transmitted to the embryos through the pores in the shells, so always wash your hands after coming back in the house and then again before opening the incubator.
Handling the eggs gently is also important obviously. If an egg does crack by accident, all is not lost. I small minor crack that hasn't broken the membrane can sometimes successfully be repaired and the chick will subsequently hatch.
A thin layer of water soluble white glue, candle wax or even correction tape applied over the crack is recommended. Try to cover only the barest minimum of shell surface you have to when repairing the crack.
We had a bit of excitement last night. At around 1:30am, we lost our power. Luckily we do have a generator, so as soon as the generator came on, it woke me up and my first thought was my future peeps.
Not all of our outlets are hooked up to the generator so I needed to be sure that the incubator was still working.
Fortunately the 'bator was toasty warm and working off the generator. It had lost two tenths of a degree during the time between when the power went off and the few minutes until the generator kicked on, but all was well.
We found out this morning that a tractor trailer truck had hit a pole on the main road near our house. The power has gone off twice more this morning, most likely due to them fixing the pole, but the generator has gone on and the eggs are just fine.
In general, hatching eggs will still be fine if they are cooled even for a couple of hours, they might just hatch a day late.
Today the legs and wings will continue to develop and the major organs would be visible in candled eggs. The sex organs are beginning to form and the aortic structure is developing.
I am still hand turning the nine eggs since yesterday's candling wasn't conclusive enough to discard any non-viable eggs. I will candle them again on Day 7 and hope to see more.
I also put a radio in the 'nursery' turned to a classical music station. I don't know that any research has been done on chickens and Mozart, but if it supposedly makes human babies smarter, maybe it makes chicks smarter too...if nothing else, at least they may be calmed at bit by the music since at some point they can hear inside the shell.
Day 6Patience not being one of my virtues, and also because I want this hatch to be a learning experience for me as well as you all, I candled each egg this morning as I was turning them.
I think its pretty evident that we have some chicks forming inside some of the eggs! The darker-shelled eggs are pretty hard to see through and inconclusive still, but the lighter shelled eggs showed a clear 'spider' formation.
The heart and eyes are developing, along with the beak, and the 'spider legs' are blood vessels. Today the wings and legs of each embryo are almost complete and the larger organs are beginning to develop.
As the embryos continue to develop and grow, the air space in the egg begins to get larger and the egg actually loses weight. Watching the changes in the air cell during candling is another way to determine whether the chick is developing.
Day 7
The reproductive system has formed in each chick but it's impossible to sex the embryos, so we'll have to wait for quite awhile to find out if we have hens or roosters.
The eggs have completed their first trimester ! Their feet, toes and wings have developed and feathers are starting to form. The heart is still outside the body but by tomorrow will have moved inside. The skull is encasing the brain and the beak will soon begin to grow.
Did you know that chickens and ducks differ greatly from the birds of prey and parrots as far as how they are born. Chickens and ducks hatch with their eyes open and covered in down. They leave the nest within a few days and will start foraging for food within several hours.
Birds of prey on the other hand are hatched with their eyes closed and little to no down. They are incapable of leaving the nest and have to be fed by their parents.
It is kind of ironic how self-sufficient chickens are early on, and how helpless hawks and other raptors are, but ultimately the chickens become the prey and the hawks the predators.
On the outside, the eggs look exactly the same as they did the day I put them in the incubator, but if we could see inside, the changes taking place are nothing short of miraculous. In just 9 short days, the embryos already are starting to look like chicks.
The heart is now within the body and circulating blood via an imbilical cord. The eyes have formed. There are feathers growing on the wings and the feet and individual toes are formed. Soon bones will begin to form, as will the beak. The air sac is continuing to grow in size.
The hatch rate of fertile eggs set under a chicken (au naturale, if you will) nears 100%. Using an incubator (artificial hatch) drops the average hatch rate down to 75-85% and using shipped fertile eggs (versus eggs your own chickens lay or local hatching eggs) drops the hatch rate down closer to 45-50%.
But careful handling, proper storage and turning as well as good quality breeding stock can push the number of eggs that do successfully hatch a bit higher. Our fingers are crossed for a great hatch !
Contrary to old wives tales, eggs will not hatch in a woman's bra or an apron pocket, as the human body temperature of 98.6 is too low to sustain development inside an egg.
Fertile eggs also will not hatch if left out on your kitchen counter despite what you might read or hear. A temperature nearing 100 degree must be maintained for the eggs to even begin to develop.
Eggs from an older hen have a lesser chance of hatching, but the chicks that do hatch will generally be stronger, healthier and more disease-resistant than those chicks that hatch from eggs laid by younger hens.
♪♫♪Antiiiicipaaation....anticipaaaaation is making me wait....♪♫♪
I think the waiting is the hardest part. I check on the eggs many times a day, making sure the temperature is right (which it always is thanks to my Brinsea Mini Advance incubator) and the one reservoir is still filled with water. I am turning the eggs religiously.
Every day I cross one more square off on the calendar, patiently counting down until Day 21.
Today the bones are being formed and the beak is starting to harden. All of the eggs have sort of a dark 'blob' in them, with an air sac at the blunt end. As the chick grows, the dark part should continue to get larger, as should the air sac.
The yolk will eventually be absorbed by the growing chick and is what sustains it during its first hours of life.
Did you know that an egg contains all the nutrients necessary for life except for Vitamin C ? Chickens don't need Vitamin C to sustain life.
Amazing things are still happening inside the eggs.
I had thought by now I would be able to weed out any that clearly weren't developing, but since this is my first time hatching eggs, I don't feel confident enough to sentence any potential baby chick to death unless I am POSITIVELY sure it is either infertile or nonviable and I just am not sure, so all nine eggs are still percolating.
A dark 'blob' is visible in each egg, with a clear section that is the remaining egg white. There is an ever-expanding air sac at the blunt end of each egg, and veining is visible in those with the lighter shells.
Looking good for these little peeps.
I do know that any eggs that start to leak or 'weep' need to be removed immediately since they can introduce bacteria into the incubator that could kill the other developing chicks. A blood 'ring' is also a bad sign, clearly visible during candling, that indicates bacteria has entered the egg through the shell.
This ring was clearly visible through the shell (not my hatch, a friend's) so she knew that bacteria had gotten inside.
Not much going on today....just turning the eggs, checking the water reservoir and the temperature...there is down growing from the feather follicles now.
Day 13
If we were to break open the eggs today (which we won't!) we would be able to tell what color each chick will be. The down would be clearly visible and colored. The skeleton is also beginning to harden and calcify and the claws (or toenails) appear.
Not the best candling photo, but each egg has a nicely developing air sac, and in the lighter shelled eggs I can see the embryo floating around inside the shell ! There is obvious veining visible also. I still have all nine eggs in the incubator and am hand turning them. The chick is practically formed, even the toenails have formed.
And it actually looks like a chick inside. The chick is rotated now so that its head is at the blunt end of the egg near the air sac, which is the position it needs to be in in order to break out of the shell.
I will try to get at least one better candling photo for you to see.
Still not any great candling photos but I can definitely see the outline of chicks in some of the lighter shelled eggs. We are a week away from the hatch date and so far everything looks good.
Honestly...the waiting is KILLING me ! I check on the eggs, turn them, but honestly the Brinsea Mini Advance does it all. If I only had 7 eggs inside, the Brinsea would handling the turning also and I would just have to be sure the water reservoir was full.
The beak, leg scales and claws are almost completely formed. The growing chick has used up the egg white as a food supply and will soon be starting on the yolk.
Today the neck and breast muscles will continue to develop and strengthen in order to help the chick have the ability to break out of the shell. The embryo has turned its beak towards the air cell...we're getting close now. Amazing how on the outside nothing is going on, but inside, the daily changes are amazing.
I will do one final candling tomorrow before 'lockdown'. To my untrained eye, all nine eggs seem to be developing so I still haven't weeded out any.
It will be pretty crowded in the incubator if all nine do hatch (I can only hope!) so I will have the brooder box ready and warmed and start moving the chicks into that as soon as they have dried off.
Sometimes peeping can be heard from inside the shells. I haven't heard any yet, but I am going to cluck at the eggs a few times a day from now until they hatch to see if they will respond.
Today the eggs got their last turn, pats on the head and then gently placed back into the incubator for the duration.
Day 19 LOCKDOWN !!!!
From this point on, the egg shouldn't be moved because the chick will have to reorient itself and that can weaken the chick to the point it won't have the energy to break out of the shell. The next time I open the incubator it will (hopefully) be to take nine new baby chicks out !
Tick tock, tick tock, tick tock....
Both reservoirs are filled with water to increase the humidity in the incubator. The correct humidity level is important to keep the egg membrane soft enough for the hatching chicks to easily break through.
The water guard is in place so the chicks won't drown once they hatch.
I have had the shelf liner or paper towel in the incubator to keep the eggs from rolling the whole time, but had I been using the auto- turner, at this point I would remove the turner and put down paper towel or shelf liner so the chicks have something to grip when they hatch instead of a slippery plastic surface.
The yolk is now being absorbed into the chick's body. This is what will keep the chick nourished until it hatches. The carbon dioxide levels within the shell have begun to increase, which causes the chick's neck muscles to start twitching. The stress of this will actually kill any chicks that aren't strong enough.
If a chick doesn't have sufficient B Vitamins or enough strength, it won't make it past this stage.
Assuming that isn't the case and all the chicks will be nice strong little ones, the chick inside each egg is preparing to hatch. It will assume the 'hatch position' in which it turns its head towards the blunt end of the egg and tucks its head under its right wing.
It will curl its feet up towards its head and gets its beak positioned to break through the air cell at the blunt end of the egg.
The chick will open its beak for the first time and its lungs will inflate, causing blood to start circulating. The embryo now takes up most of the interior space inside the shell.
I checked on the eggs this morning. There is a bit of condensation around the edges of the incubator, so that means the humidity level is higher, which is good because it keeps the membrane soft, easier for the chick to break through and won't stick to the chick.
Other than that, no peeping yet or other signs of movement. Now we're getting down to the wire.
The yolk has been completely absorbed into the chick's body and today the chick will break through the membrane and begin to breathe the air in the air sac.
As the air in the sac gets used up, the chick will start to break a hole in the eggshell with its egg tooth to let in outside air. (The egg tooth will fall off soon after the chick hatches.) This is referred to as 'pipping' and should begin tomorrow on Day 21.
I have the brooder box set up and ready to go next to the incubator. I am trying the Brinsea EcoGlow 20 for the first time instead of a traditional heat lamp.
So far, it seems a lot easier than trying to rig up the red heat light. The chicks go underneath it to warm up as needed. I'm interested to see how they do with it. I'll probably keep it in the middle of the box at first until the chicks get a bit bigger.
Pip.... Zip... PEEP!
We have pipping ! 5 out of the 9 eggs have started to pip ! Eggs #3 and 4 (Olive Eggers), #7 and 8, (Light Sussex) and #9 Ameraucana have begun their Great Eggscape !
The chick uses its egg tooth to break a hole in the eggshell, letting in air, and then will continue to chip around the top of the shell in a circular pattern, stopping to rest periodically. This can take anywhere from 30 minutes to a few hours.
When the chick makes it way all the way around, the top of the egg will pop off and the chick will push the rest of the shell off with its legs. Wet and exhausted, the chick will then often lay down, close its eyes and rest for an hour or more.
They should stay in the incubator to rest and dry off completely - at least several hours and up to 24 hours. They don't need to eat or drink for at least 48 hours, so the best place for them is in the incubator until they are fully dry and starting to become active. Then it's off to the heated brooder!
I have a packet of Sav-a-Chick and a pitcher of water coming to room temperature to give to the chicks when they are hatched, dried and ready to be moved into the brooder. The brooder box is warming up in preparation.
And so the first day of the chicks' lives begins...
Eggs are Hatching!
Footnote: all nine of the eggs hatched ! Welcome to the world little peeps !


