How to Grow Sweet Potatoes in Feed Bags
Sweet potatoes are easy to grow in your garden and despite what you might think, you don’t need lots of space to grow them.
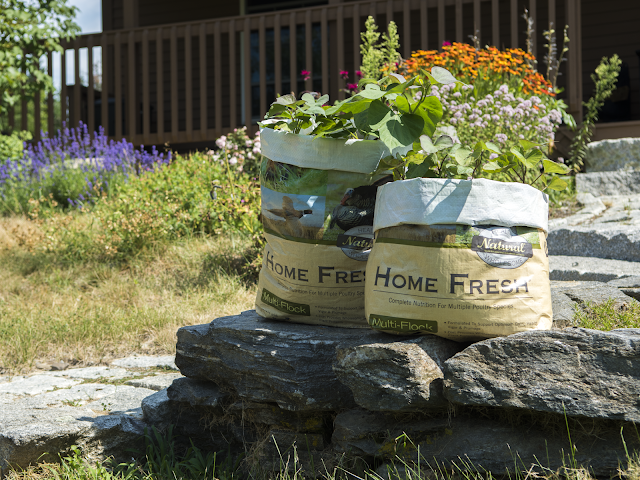
As a matter of fact, my favorite way to grow sweet potatoes is in an old chicken feed bag right on the back patio or on the deck.
When we first moved to Maine from Virginia, I wasn’t certain I could grow sweet potatoes. I knew I could grew white potatoes, because in fact Northern Maine is a high producer of potato crops. But sweet potatoes aren't terribly cold tolerant and the plants are far more fragile than regular potatoes.
However, once I stumbled upon the idea of growing them in feed bags, I realized that growing sweet potatoes in Maine is absolutely doable.
How to Grow Sweet Potatoes in Feed Bags
I just start the potato slips indoors, then plant them in old feed bags repurposed into garden grow bags. At that point, I set the bags outside in a sheltered area that gets lots of sun.
I can them move them inside on cold days or at night, then move them back outside once it warms up.
And remember that the soil in your grow bag will likely be warmer than the ground soil, which is another benefit to growing in bags.
In short, I give the sweet potatoes exactly what they need in order to thrive. So don’t throw out your empty chicken feed bags!
Here’s what else you’ll need to grow sweet potatoes.
What you Need to Grow Sweet Potatoes in Feed Bags
- To get started, flatten the bottom of the feed bag so it sits level on the ground.
- Then roll down the top of the bag until the bag is about a foot tall.
- Next, cut several holes in the bottom for drainage, about 1” in diameter.
- Then cut a piece of window screen to fit in the bottom of the bag. (This will help to keep the soil inside the bag.)
- Finally fill the bag with about 4” of potting soil mixed with some straw. This will keep the soil nicely aerated.
- The soil/straw mix is a good composition for the potatoes to grow in.
Now you’re ready to plant!
Tips for Growing Sweet Potatoes in Feed Bags
If you have an extremely short growing season like we do in Maine, you can start your slips in the house several weeks before your last frost date.
Once the danger of frost has passed and the soil temperature has reached 60° F., tuck three or four slips into the soil in your prepared grow bag.
Then cover the slips with an additional four inches of the soil/straw mix and water them well.
Set the bag in the sun and keep the soil moist.
Note: You don’t want to fertilize your potatoes. That will encourage foliage growth, instead of root growth. Obviously since you're going to be eating the "root" and not the foliage - although your chickens will love eating the leaves and vines once you have harvested your potatoes! - you want the root to do most of the growing. Fertilizing the soil will lead to a smaller potato harvest.
As your potato plants start to grow, roll the top of the bag up little by little. Mound more of the straw/soil mixture around them, keeping all but the leaves buried in the soil. Keep the soil moist, but be sure not to over-water them.
Since sweet potatoes are so cold-sensitive, you might need to cover the bag at night or even bring it inside until the weather is consistently warmer.
Sweet potatoes prefer temperatures around 75° F., but can survive temperatures down to about 60° F. Any lower than that, and you'll want to cover or move your bag.
Harvesting and Storing Sweet Potatoes
It will take between 4 and 5 months for your potatoes to be ready to harvest, depending on the variety you grow.
When the leaves on the potato plants turn yellow and start to die, your potatoes should be ready to harvest.
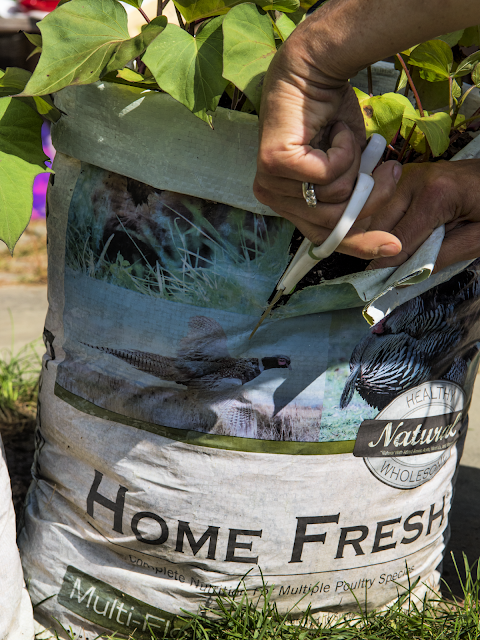
Cut down the side of the feed bag with scissors or a sharp knife and carefully pull out the potatoes.
Brush the dirt off of the potatoes and lay them to air dry indoors in a well-ventilated area for a week or two at room temperature.
Whole sweet potatoes can be stored through the winter in a cool, dark, dry location in an area that stays around 55-60° F.
You can also cut the potatoes into chunks and freeze them raw.
And be sure to save some potatoes to start next year’s crop (see below for instructions on starting your own sweet potato slips).
Also, don't forget to give the stems and leaves to your chickens to enjoy along with the straw/soil left in the bag! And be sure to share some of your potato harvest with your flock too. They’ll enjoy the potatoes either raw or cooked.
Instructions for Starting Potato Slips
Sweet potatoes don’t grow from an “eye” like a white potato.
Instead you need to start a plant from the potato itself.
- To start sweet potato slips, about two months before you’re ready to plant outside, cut a sweet potato in half and place it in a jar of water on your kitchen windowsill so about half the potato is submerged and half is sticking out of the water.
- Change the water in the jar every few days.
- Your potatoes should start to sprout shortly.
- After a few weeks, the sprouted vines should be about six inches long.
- At this point, you can plant the whole potato in your grow bag as described above.
- Alternatively, you can break off the vines of the potato place them back in the jar of water on the windowsill until they grow nice strong roots, changing the water every few days.
- When the vines have sprouted roots in the water, you can then proceed as described above and plant them.
Fun Facts about Potatoes
Did you know that white potatoes are a member the nightshade family and contain a toxin that isn’t good for your chickens?
Did you also know that sweet potatoes are in the morning glory family and the entire plant is completely edible for your chickens?
Sweet potatoes are also more nutritious for your family than other types of potatoes. So why not switch to eating sweet potatoes in your home? And definitely try growing your own!


