Good Better Best | Smart Chicken Keeping Decisions
in
Chickens,
There's not only one way to raise chickens. But there some ways that are better than others.
But while some decisions are personal preference, in other cases making a bad choice could mean life or death for your chickens, or at the very least illness, discomfort or less than optimal health.
So instead of learning by trial and error and thereby putting your chickens at risk or searching Google and trying to sift through all the misinformation, why not learn from someone else's extensive research, successes and mistakes? No need to reinvent the wheel !
Good Better Best | Smart Chicken Keeping Decisions
I have been raising chickens for the past several years. My brother and I also raised chickens as kids. Furthermore, I am the granddaughter of chicken keepers, growing up across the street from their chicken farm.
While I am still learning and certainly no expert, raising chickens is in my blood. I tend to do things the traditional way, as naturally as possible, but am open to exploring new, modern innovations when they seem superior to the old tried-and-true methods (which honestly really isn't very often!)
These suggestions are merely that, my suggestions, based on my research, reading, listening to fans and what works for me. Something might work for you, others might not, but I thought it would be interesting for you to learn what I do and why:
Brooder Floor Covering
Good: Paper towels
Better: Puppy weewee pads
Best: Rubber shelf liner over newspaper
Bad: Sand, newspaper
Sand can harbor e.coli [read HERE for the scientific study on that] and the chicks will be tempted to eat it (since they are programmed to eat whatever is at their feet), which can result in impacted crop since sand gets sodden until regular dirt or chick grit, not to mention the accidental ingestion of bad bacteria.
Heat + fecal matter + moisture + sand = very bad combination = great breeding ground for e coli and other pathogens. Not only that, but you know how hot sand gets at the beach in the summer on your feet? Under a heat lamp set around 95 degrees, that sand is going to get hot on little chick feet.
Our vote goes to a piece of rubber shelf liner over several layers of newspaper. The newspaper will absorb any moisture and the shelf liner is washable and reusable. A great way to get one final use out of your discarded newspapers but still provide a surface that chicks can grip easily.
Brooder Litter
Better: Pine shavings
Best: Pine Chips and dried herbs
Bad: Sand, cedar chips, sawdust
Shredded paper works okay but it if gets wet it has a tendency to paper mache the chicks. Pine shavings have good antibacterial properties but can be dusty. Sand is a no-no (see above), cedar can be toxic and the oils are too aromatic and can cause respiratory issues and sawdust is too dusty and can also irritate lungs and throats.
Our vote goes to larger pine chips with dried herbs mixed in for even more antibacterial and other benefits. Oregano, lavender and mint are some of our favorite brooder box herbs.
Brooder Light
Good: White heat lamp or lightbulb
Better: Red heat lamb
Best: Brinsea EcoGlow
Bad: Brooder too cold or too hot, no light
More closely mimicking the heat under a mother hen, the chicks can scamper around the brooder and then return to the EcoGlow when they need to warm up. [Purchase the EcoGlow from Brinsea and take 10% off using the coupon code FRESH]
Introducing New Flock Members
Good: Keep separated for a few weeks, add at night
Better: Keep separated for a few weeks with fencing in between so the two groups get 'face time'
Best: Keep separated for a few weeks with fencing in between so the two groups get 'face time', add new members to flock, providing places they can hide under or hop onto to avoid pecking
Bad: Wipe the new hens with dryer sheets; add new flock members without any quarantine or 'getting to know you' phase-in
When you do let them mix for the first time, supervise and be sure to hand out treats to keep their minds off the new flock members. Since chickens recognize each other by silhouette and body and comb shape and size, wiping the new additions with dryer sheets or spraying them with vinegar or some other substance to disguise their scent is not going to be effective.
Roosts
Good: Round wooden dowel
Better: 2x4 board with the 2" side facing up
Best: 2x4 board with the 4" side facing up, with slightly rounded corners on the top or a branch
Bad: Metal pipes or roosts with rough edges/splinters
Be sure the roosts aren't too high and that there is plenty of soft bedding below to prevent bumblefoot. Splinters, roosts that are too high and sharp objects on the ground can all lead to bumblefoot, which is an infection that needs to be treated.
Coop Size
Better: 5 square feet of floor space per hen
Best: the most space you can manage for the final number of hens you ever plan on raising
Bad: Less than 3 square feet per hen
Our vote goes to building or buying the largest coop you can! No matter how many chickens you start with, you are going to want to expand your flock and it's far easier to add more chickens to fill a large coop than build a new coop or add on to your existing coop.
Coop Litter
Good: Shredded newsprint or paper
Better: Pine shavings, needles or chips
Best: Straw
Bad: Sand, cedar chips, sawdust, hay
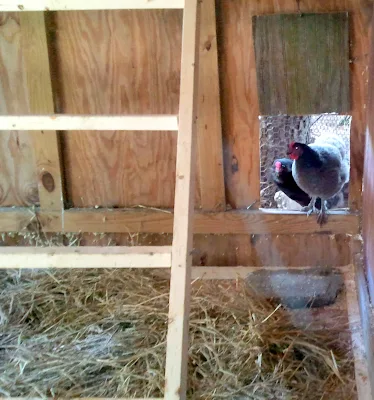
For many of the same reasons we don't recommend using sand, cedar chips or sawdust in the brooder (above), we don't recommend it for your coop either. Hay should not be used either as it is too 'green' and can easily mold or harbor bacteria and mildew. We use straw exclusively in the coop and nesting boxes after trying pine shavings. [Read HERE to find out why we decided to stick with straw]
Run Size
Good: 10 square feet per hen
Better: the most space you can manage for your current flock
Best: the most space you can manage for the final number of hens you ever plan on raising
Bad: Less than 10 square feet per hen
Good: 2" welded wire or chain link
Better: 2" welded wire or chain link wrapped in chicken wire
Best: Welded wire or chain link sunk into the ground, wrapped in chicken wire and covered
Bad: None, chicken wire
While 2" welded wire or fencing will keep out most predators, rodents, snakes and weasels can still squeeze through. Free ranging offers no protection from predators. A dog, fox or raccoon can rip through chicken wire with no problem, although it is a wonderful secondary fencing that will keep out weasels and other smaller predators.
Our vote goes to chain link which is even more durable than welded wire, with the bottom 1-2 feet wrapped in chicken wire and sunk 8-12 inches into the ground, with the top of the run also covered.
Dust Bath Area
Good: Dry, loose dirt in a corner of the run
Better: Dry, loose dirt with Diatomaceous Earth added
Best: Dry, loose dirt with DE, wood ash and dried herbs added
Bad: No area to bathe in
Our vote goes to a nice area filled with loose sand or dirt with DE, wood ash and some dried herbs mixed in for the ultimate bathing experience to help the chickens stay parasite-free. [Read more about dust baths HERE]
Worm Preventatives
Good: Regular fecal samples and treating worms commercially if needed
Better: Food-grade DE (diatomaceous earth) and garlic added to feed on a regular basis
Best: Year-round feeding of natural worm deterrents such as garlic, DE as well as a twice yearly portion of pumpkin 'soup'
Bad: Twice yearly 'pre-emptive' worming with commercial medication when no evidence of worms is seen
.jpg)
We never advocate administering any medications without just cause. Although many sources recommend a twice yearly worming as a preventative with a commercial wormer, I have never done that.
Instead, I rely on the natural worming properties of a natural substance found in pumpkins and other squash and melons. Safe, natural and effective, it has also been studied and is a proven worm deterrent.
[Read more HERE about natural worming using garlic, DE and nasturtium as well as pumpkin seeds]
Good: Layer feed
Feed
Good: Layer feed
Better: Organic layer feed
Best: Organic layer feed with added supplements, free-choice oyster shell or eggshell and grit
Bad: Old, moldy, rodent-infested or wet feed
Good: Galvanized steel traditional feeder
Better: Tub or deep dish
Best: Vintage Stoneware feeder
Bad: Leaving feed out in the run overnight to attract rodents
Our vote goes for our 'new' discovery - a shallow terracotta dish covered with a sort of vintage stoneware cloche that old-timers used to use as feeders. Terracotta is a wonderful feeder material because it will wick any moisture away from the feed.
The cloche prevents the chickens from standing in the dish and kicking feed out. I find near zero waste using this type of feeder. You could make your own by knocking a few indents in the lip of a terracotta planter and turning it upside down on the base.
The cloche prevents the chickens from standing in the dish and kicking feed out. I find near zero waste using this type of feeder. You could make your own by knocking a few indents in the lip of a terracotta planter and turning it upside down on the base.
Good: Cool, clean water
Better: Water with 1T of apple cider vinegar added several times a week
Best: Water with ACV and a clove of garlic added several times a week
Bad: Dirty, stagnant water that is allowed to become too warm, frozen water
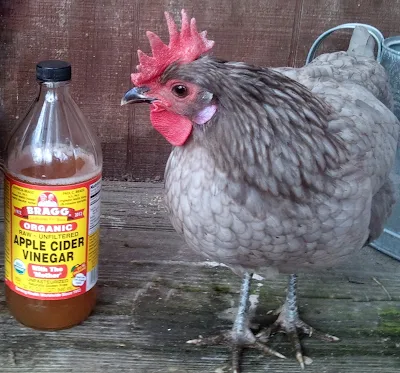
Our vote goes to plain clean, fresh water enhanced with apple cider vinegar and garlic to provide added health benefits. [Read more about the benefits of both additives HERE]
Waterers
Good: Galvanized waterer
Better: Plastic waterer
Best: Large deep rubber tub, or in the winter an electric dog water bowl
Bad: Rusted or leaky waterers
Chickens need access to water at all times. Galvanized steel waterers rust, especially if you add vinegar to your water, and freeze quickly in the winter. Traditional plastic waterers are hard to clean, tend to collect algae and crack in the winter.
We are not going to weigh in on nipple waterers right now. Not advocates in the past, the owner of The Chicken Fountain has invited us to test his product for ourselves and see how we like it. Stay tuned in the coming weeks for our review of their product.
So for now our vote goes to a deep rubber tub. A black one will help keep water unfrozen in the winter if placed in the sun with a few ping pong balls floating on the surface. We also use an electric dog water bowl in the winter.
Coop Cleaner
Coop Cleaner
Good: Bleach
Better: White Vinegar
Bad: No regular cleaning
Non-toxic, it is effective and inexpensive. Or even better try some homemade Orange Peel/White Vinegar cleaner next time you clean! [Recipe HERE]
Treats
Good: Occasional kitchen scraps
Better: Healthy garden cuttings and overripe or wilted greens and vegetables
Best: Grow the chickens their own garden filled with leave greens, melons, squash, cucumbers and other vegetables and edible flowers; chopped grass and edible weeds
Bad: Unhealthy kitchen scraps, anything that could potentially be toxic
Our vote goes to planting a garden for your chickens full of nutritious vegetables. Even healthy treats should be limited to afternoons and less than 10% of your flocks' diet. HERE are some examples of good treat choices.
Weeds and cut grass make excellent treats that can be fed unlimited, since they replicate what a free-range flock would be foraging all day long. I plant a garden just for the chickens that they enjoy all summer long and then are allowed to eat the remaining plants in the fall. There are some things that can potentially be toxic and should be avoided. HERE is more information on that.
Egg Handling
Good: Washing eggs as soon as they are collected in warm water and refrigerate
Better: Don't wash eggs until just before eating and store on the counter
Best: Don't wash eggs until just before eating and refrigerate
Bad: Washing eggs in cold water and leaving them out at room temperature
Our vote goes to storing eggs in the refrigerator, pointed end down to further preserve freshness, and not washing them until just before you use them. Keeping your nesting box bedding fresh and clean should ensure clean eggs for the most part.
Eggs are laid with a natural 'bloom' on them and that bloom helps prevent both air and bacteria from entering the egg through the pores in the eggshell. As long as the egg isn't washed, it will stay fresh on the counter for at least two weeks, but for better longevity, store unwashed eggs in the refrigerator where they should be perfectly fine to eat for 2-3 months. [Read more about handling and storing eggs HERE]
All opinions are my own, formed through my first-hand experience of what works for me. Please try out various methods to see what works best for you, your budget and your flock. I would love to hear what you decide.
Pin This!


