10 Tips For the Best Garlic Crop Ever
Garlic is one of my favorite crops to grow.
Not only do you plant it in the fall when you aren't busy with other garden chores, nothing ever seems to bother it - not insects, my chickens, the deer, wild turkeys, raccoon, nothing.
So that means I can plant it outside my fenced in garden area where it's not taking up space where I will be planting vegetables seeds come spring.
A few years ago I wrote a comprehensive guide to planting garlic (there's even a video!), so if you've never planted garlic, you might want to start there.
10 Tips For the Best Garlic Crop Ever
However, if you have tried planting garlic, but had less than stellar results, then you might want to try these few simple tips.
1. Size Matters
Choose the largest cloves to plant and you'll end up with the biggest bulbs the following spring, although the size might not be terribly uniform. So try selecting medium-large cloves to replant if you're looking for the most optimally-sized cloves.
You don't generally want huge cloves for cooking anyway, so medium to medium-large cloves are best for planting.
Separate the bulk into individual cloves to prepare for planting, and be sure to leave the papers on. Think of the papers as little "jackets" for the cloves to sleep in through the winter!
2. Store in a Cool Spot
Your garlic cloves will grow best - more uniformly sized, be less likely to form double cloves joined together, and store longer once harvested the follow year - if they are stored for at least 2 weeks in temperatures between 43 and 50 degrees. So a garage, basement or other cool spot is a good place to tuck the cloves you'll be planting for a couple of weeks.
Just don't let them freeze. Cloves exposed to temperature below freezing will produce smaller, weaker cloves.
3. Till Just Prior to Planting
Your garlic cloves will grow best - more uniformly sized, be less likely to form double cloves joined together, and store longer once harvested the follow year - if they are stored for at least 2 weeks in temperatures between 43 and 50 degrees. So a garage, basement or other cool spot is a good place to tuck the cloves you'll be planting for a couple of weeks.
Just don't let them freeze. Cloves exposed to temperature below freezing will produce smaller, weaker cloves.
If you plan on tilling your garden, you'll want to till just prior to planting your cloves.
Choosing to till when the soil is fairly dry will work best.
This "just prior" tilling ensures loose soil structure that will allow the cloves to send out nice roots before the ground freezes.
4. Plant your Garlic Between Halloween and Thanksgiving
This brings me to the timing. I think many people plant their garlic too early. A good rule of thumb is to plant between Halloween and Thanksgiving for most of the country.
Here in Maine, I aim for the middle of October, but if you're further south, you can still wait a bit. You want to get your garlic in the ground about a month before the ground freezes.
You need to plant early enough to allow the cloves to start to root, but not so early that they send out shoots. If green shoots start to grow in the fall, that could mean the end of your garlic harvest.
5. Fertilize, but Don't Over-Fertilize the Soil
Garlic is a heavy feeder, so it needs a good-quality soil, but too much nitrogen in the fertilizer will lead to more shoots, leaves and scapes and less root growth.
Root growth is what we're going for here, so take it easy on the nitrogen-rich fertilizers.
Instead think about tossing some eggshells, chicken feathers, dried leaves, or other natural soil enrichment materials to your garden plot.
6. Give your Cloves Breathing Room
Each clove should be spaced about six inches from the other when you're planting them.
I plant mine in rows spaced six inches apart with six inches between each clove in the row.
This ensures that each clove will get enough nutrients from the soil, enough sun for the leaves to grow and enough space to grow to its fullest potential.
7. Plant Deep Enough
Garlic cloves should be planted at least three to four inches deep.
I plant my cloves about three inches deep. A general rule for any bulb (or seed for that matter!) that you're planting is to plant them 2 or 3 times as deep as the bulb is tall.
8. Plant Right Side Up
Garlic cloves should be planted with the pointed end up and the flat end down. The roots grow from the flattened end, and the leaves and scapes grow from the pointy end.
Upside down cloves will face challenges taking root and growing, to say the least!
9. Add Some Mulch
While mulch isn't absolutely necessary for your garlic bed, it will help keep your garlic warm and happy through the winter.
I mulch my garlic with about six inches of straw from my chicken coop in the fall when I clean out my coop before winter. About 6" is a good amount, although 8" won't hurt. You can also use dried leaves, shavings, hay or grass clippings.
This not only keeps the weeds down in the spring, but helps hold warmth in the soil and reduces the chance of frost heaves that can push the cloves to the surface and potentially kill them.
10. Snap those Scapes
In the spring, you'll start to see green leaves poking up through the mulch. That's good.
You can leave the mulch right where it is.It will continue to retain moisture and keep weeds down until it's time to harvest your garlic.
You'll want to keep an eye out for any scapes though.Those are the tubular growths that start to curl up from the center of the leaves.
Snap them off.
You want your garlic to concentrate on growing a larger bulb, not the scapes (and eventually a flower). But don't toss the scapes. You can slice them thinly and use them as you would scallions.
Bonus Tip! Pull a Test Bulb
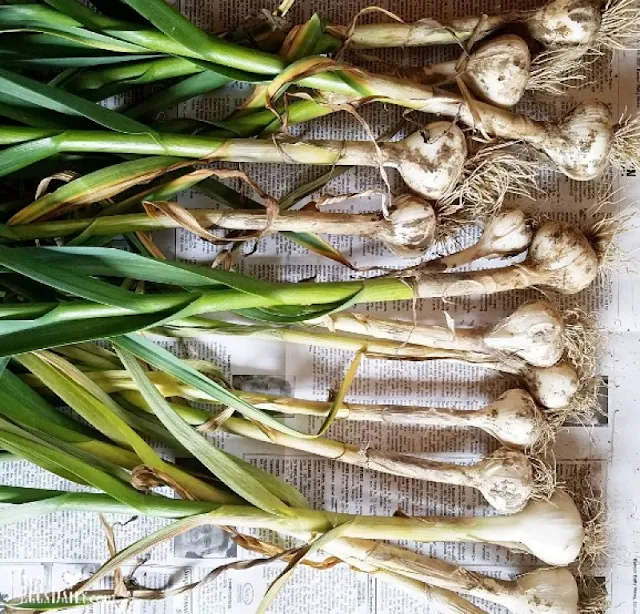
Once the leaves start to turn yellow, it's time to check to see if your garlic is done. Pull a test bulb. If its not as large as you want, wait a week and try again.
Use the smaller bulbs you pull to add to your chickens' water or cook with.. .and remember to save some of the largest cloves to plant the following spring. (See above!)
And remember, there's more information about planting garlic here. And here's a great guide to Planting Garlic in Maine.


