The Lazy Girl Guide to Enjoying Fresh Herbs All Winter
in
herbs,
Using this simple trick, you'll be enjoying fresh herbs all winter long.
If you're like me, you love fresh herbs!
Fresh herbs for cooking, fresh herbs to garnish cocktails, fresh herbs for the chickens or in their daily feed and scattered in their nesting boxes.
Hopefully you live somewhere it's warm all year round, so you can enjoy fresh herbs from the garden right through the winter.
When we lived in Virginia, I could grow a few varieties of herbs almost all year long.
Here in Maine, not so much.
But I still love my fresh herbs!
Yes, I've tried drying them, but it's just not the same.
I've tried freezing them fresh for a fun treat for my chickens in the winter.
They weren't too excited about them and it took up a lot of freezer space!
I've tried transplanting them, repotting them into pots in potting soil and bringing them inside.
But really... who has time for that?
And who can even remember to water them on a regular basis?
So, that gave birth to "The Lazy Girl Guide to Enjoying Fresh Herbs All Winter".
"The Lazy Girl Guide to Enjoying Fresh Herbs All Winter"
Here's what you need:
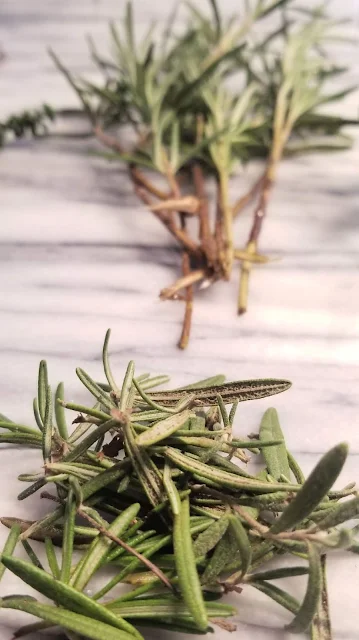
Fresh culinary herb sprigs, a variety including thyme, mint, oregano, rosemary, lavender, sage, basil
Small glass vases, jars, glasses (shotglasses work well!)
Fresh tap water
Here's what I do:
Step 1: Before the weather turns really cold (most herbs can withstand a frost or two, although take note that your basil will turn black and die at the first hint of Jack Frost!), snip some of the nicest and best-looking sprigs from the herb plants in your garden, leaving the stems as long as possible.
Step 2: Remove the leaves on the lower part of the stems, along with any damaged, bruised or dead leaves. Any leaves that are submerged in water will just rot and fall off, making the water all icky.
Note: your chickens will LOVE the trimmings or you can use them in stock or soup.
Step 3: Stick the cleaned sprigs into a vase or jar - I love these limited edition 8 oz. Ball mason jars because they're short enough to keep most of the leaves out of the water (plus they're so pretty!)
Step 4: Fill the jar with cold tap water.
Step 5: Set the jars on a sunny windowsill. I like a southern exposure for good light most of the day.
Step 6: Change the water out for fresh water once a week (or whenever you remember).
Step 7: Trim leaves as needed for cooking or your chickens. Herbs love being pruned. That keeps them from getting leggy and promotes more leaf growth.
And that's it!
Seven steps might seem like a lot, but trust me, it will probably take you longer to walk out to your herb garden than anything else!
No need to dig up the whole plant, no need to get messy repotting anything.... the herbs will grow in the water for months!
And they're so pretty sitting in their jars of water - I really love the fresh greenery in the dead of winter!
I am particularly fond of overwintering sage, mint, thyme, rosemary and basil, but experiment with other herbs - which ever are your favorites.
As an added bonus, your plants might start to grow roots, which means come spring, you can just plant them back in your herb garden one the danger of frost has passed for your area.
And one last lazy girl tip?
When you buy those fresh herbs at the grocery store in the plastic containers? Just pluck the bottom leaves from any leftover stalks, cut a bit off the bottom to let the stalk get nice access to the water, and stick them in water - and voila more fresh herbs for you!
You're welcome!
Now you'll have fresh mint for those mojitos when ever you want!
Pin This!


